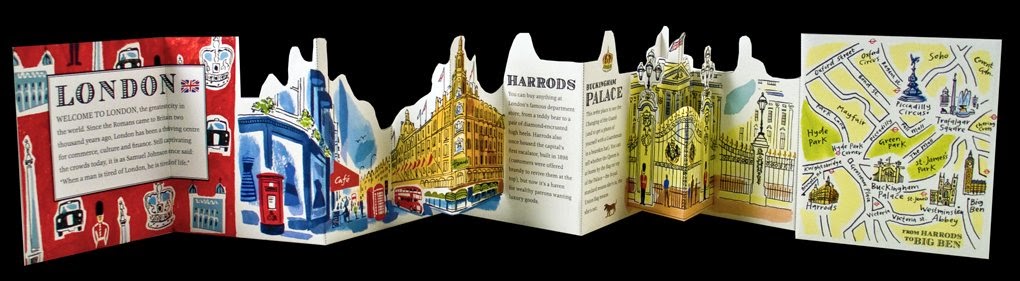
It started with this: London, A Three-Dimensional Expanding City Skyline by Sarah McMenemy. I found this book (surprise!) in London. There was something so lovely about it - how it folded out so big (over three feet long when extended) and condensed to something so small (just over 4" x 4.5"). And then there's the colours, the sights featured (been there! done that!), the die cut skyline, the extra pop-up bits - yum! Looking this up on Amazon I see she's done other locations as well: Paris, New York, Berlin, the Metropolitan Museum of Art (oh my!).
When I got home I put it away, as one often does with the little treasures of travel, but it popped into my mind 6 months ago while looking for the next collaborative for the Vancouver Artist Card Group (of which I am the humble organizer). I organize 2-3 collaboratives a year for the group ~ I think it would be shame to have a group of creatives together and not *do* something. So I took out the expanding London and tried to condense it (if you will pardon the pun) into something a group could manage, and something I could create instructions for. Then I created a prototype, which looked like this:

I thought it looked like a fun and do-able group project. I particularly enjoyed creating the backs of the houses with bicycles and recycling bins, as you can see above. So ... I created a set of instructions, a set of templates for possible house shapes and went off to the next ATC group meeting with sign-up sheet in hand. I had a good response from the group, and (as I was hoping) they got creative in a whole bunch of ways ~ from houses with onion-shaped roofs, to cars in the driveway and lots of other little details. Here's the collaborative village ...

One day, I was chatting with Sue Farrant, who hosts the Paper Angels Art Retreat twice a year, and she asked me what I'd been up to and I dug out the Accordion Village collaborative and she got this twinkle in her eye and said: How would you feel about developing this into a class for the next retreat? She told me Stampin' Up had a new set of stamps and dies in house shapes that would be perfect for this. I hesitated a little. It's been awhile since I taught an actual "class". I mean, I teach *all the time* at the ATC group, but it's just chatting with friends, so there's not much pressure. Then she showed me the paper she had in mind for the project and it was so deliciously wintery without being Christmassy (long story) that I pretty much had to go for it. And so I did (how's that for condensing a very long story into a very short one? Lol).
And here's the result ...


So, there you are ... from inspiration to collaboration to instruction in three steps. And for those of you who're interested ... I created a 12-page full-colour step-by-step instruction book for the project, and I've also got Winter Village kits using the same papers we used in the class (as shown in the Winter Village photos above). The kits have everything pre-stamped and pre-cut, and include all the trimmings so you can make your own winter village. The books by themselves are $10 and the totally ready-to-go kits (including a book) are $25, postage included. Just send me an email and let me know if you're interested.
And that whole teaching thing? Yep ... guess I'll be doing more of that ... there's another Paper Angels retreat coming up in the spring, and if Sue asks me ... I've already got ideas dancing in my head ... you might want to watch this blog for more info ...